Windows NT 4.0 Setup
To setup INAV on Windows NT 4.0, please follow the directions below:
- Open the My Computer icon by double-clicking on it.

- Open up Dial-Up Networking by double-clicking the Dial-Up Networking icon
in the My Computer Window.

- In the "Dial-Up Networking" dialog box, click on the New button.

Note: If there are no dial-up networking connections, instead
of receiving the dialog box shown in Step 3, you may see a dialog box indicating
"The phonebook is empty. Press OK to add an entry." Pressing OK
will take you to Step 4 (skipping Step 3)
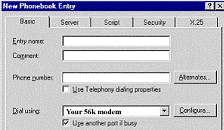
- On the "New Phonebook Entry" dialog box, with the Basic tab selected,
perform the following steps:
- In the Entry name: enter INAV
- In the Phone number: enter correct phone number
Note: Do NOT put in an area code at any time. Doing so may result
in long distance charges from your phone company.
- In the Dial using: field make sure the correct modem is selected.
- Click on the Server tab.
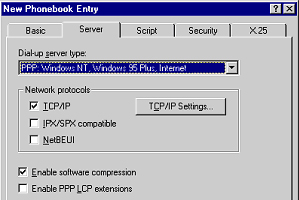
- On the "New Phonebook Entry" dialog box with the Server tab selected,
perform the following steps:
- Verify the Dial-up Server Type is set to PPP:Windows NT, Windows
95 Plus, Internet
- Under Network Protocols, verify the "TCP/IP" is the only option
selected.
- Make sure that "Enable software compression" is checked.
- Make sure that "Enable PPP LCP extensions" is NOT
checked.
- Click on the TCP/IP Settings button.
- On the "TCP/IP Settings" dialog box and perform the following
steps:
- Verify that "Server assigned IP address" is selected.

- Verify that "Server assigned name server addresses" are selected.

- Verify that both "Use IP header compression" and "Use
default gateway on remote network" are checked.

- Click OK.
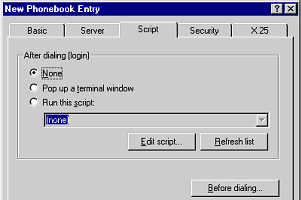
- On the "New Phonebook Entry" dialog box with the Script tab selected,
perform the following steps:
- In the “After dialing” (login) section, make sure None
is selected.
- Click on the Before Dialing... button.
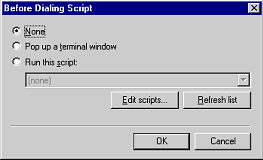
- On the "Before Dialing Script" dialog box, make sure the None
option is selected. Then click OK.
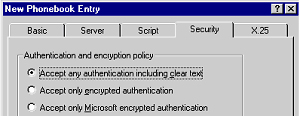
- On the "New Phonebook Entry" dialog box with the Security tab
selected, make sure that the Authentication and encryption policy is set to
"Accept any authentication including clear text." Then click the
OK button.
- At this point you should be back to the "Dial-Up Networking" dialog
box. Click the Dial button to make a connection.
- A "Connect to INAV dialog box should appear asking for your username
and password. Then click the Connect Button.


